GoDEX DT200 Series Settings
1. Install labels into printer
- Unpack printer and plug into power.
- Load labels into printer. They go face up.
- For all but TANDEM DOT-Expiring, leave the label sensor in the middle.
- For TANDEM DOT-Expiring, only move the sensor in-line with the LEFT HAND HOLE in the labels.
- Close lid, press the calibrate button on the back of the printer for 3 secs… let it calibrate.
- Press green <-| on printer to feed a single label. Try this several times.
- Note: if you cannot reliably feed a single label, eVisitor will probably not be able to print.
2. Configure Windows
- Plug the USB cord into the computer and load the driver. As of Dec 2022, the driver is ver “2021.2 M-2”.
- Print a test page.
- Note: If you can’t reliably print a Windows test page, eVisitor will probably not be able to print.
3. Configure eVisitor
- Login to eVisitor.
- Go to settings, devices, label printer, Reset printer settings to default.
- Label Printer: select “GoDEX…”
- Test by printing several badges.
4. If you are NOT using eVisitor v1.9.9.x or newer:
- Page Setup: Preset = <Default Settings>.
- Page Setup: Stock Name = 2.00 x 4.00 (or x 3.00 or x 4.75, or x 5.5).
- Page Setup: Orientation = Landscape
- Graphics: Dithering = Error Diffusion
- Stock: Start Position=0.2 (as needed)
- Page Setup: Apply
Resources
DT-230 product page

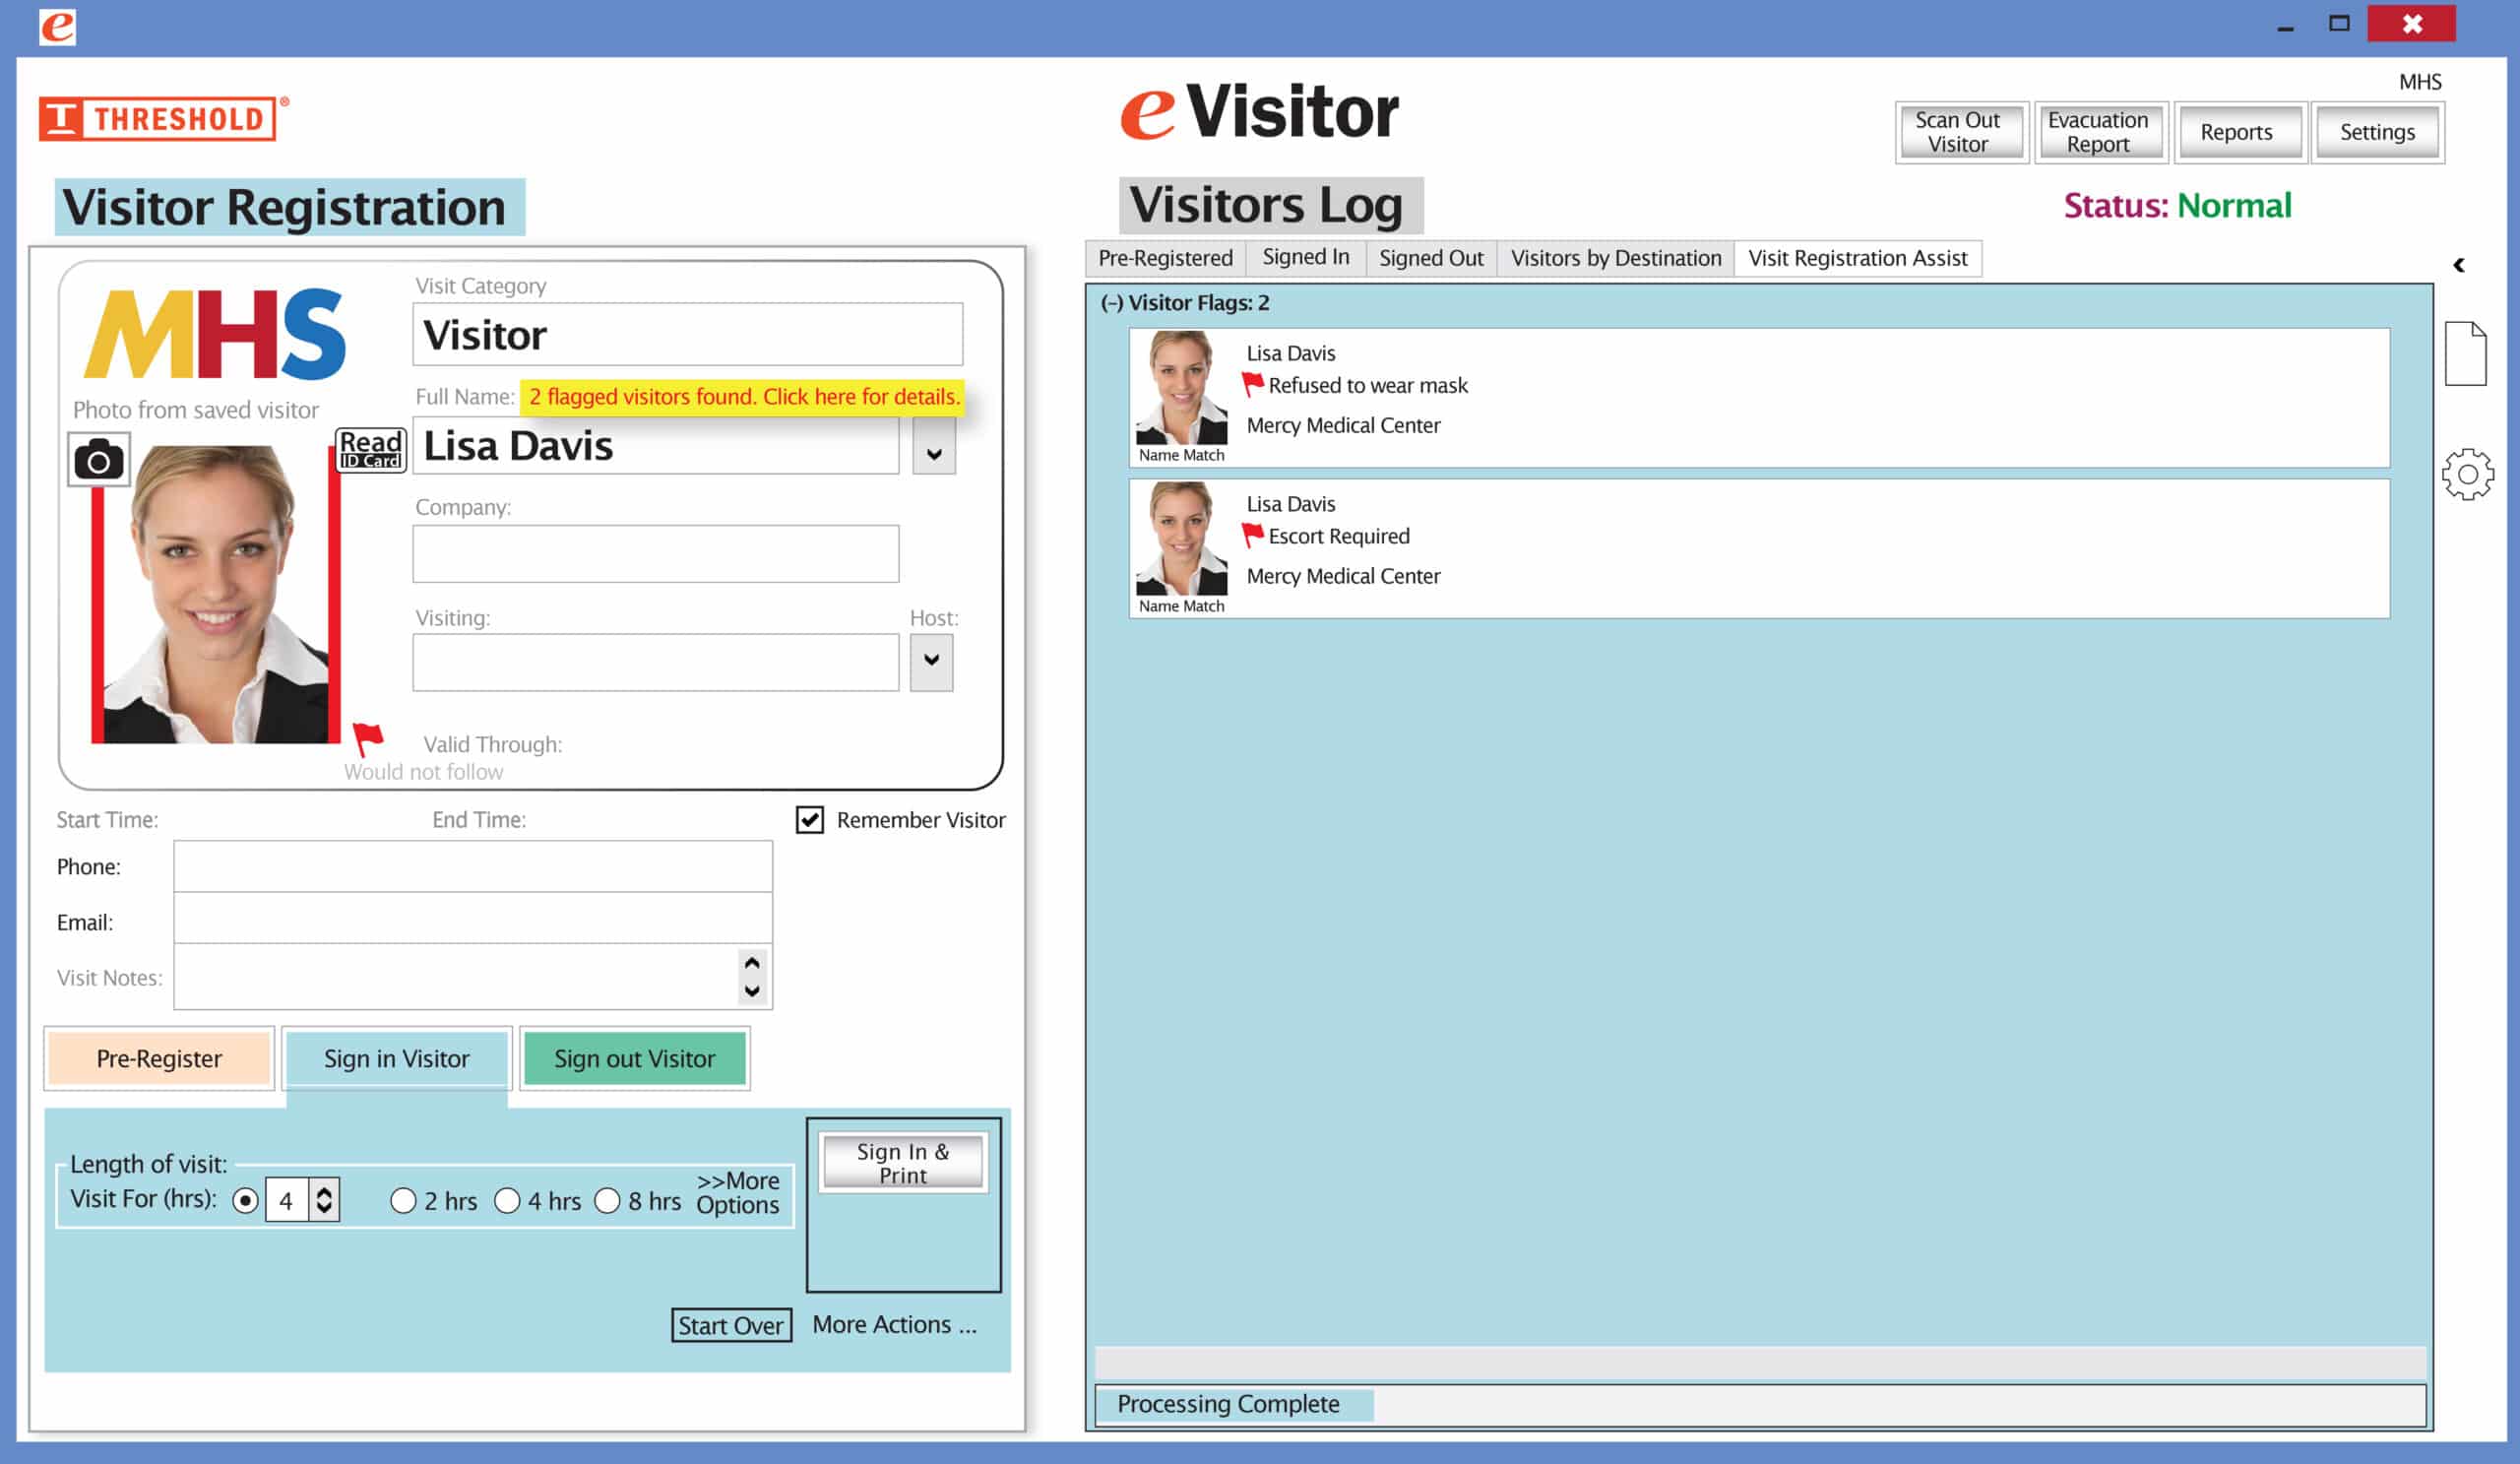 It’s easy and free to activate this feature. Simply call us and ask for “Red Flag, No Badge” to be turned on. Once it’s on, the above pop-up will come up when a red flagged visitor comes back. No badge will print and the attendant will need to follow the facility’s policy for handling red flagged visitors.