iD PRT SP-310 Settings
1. Install labels into printer
- Unpack printer and plug into power.
- Load labels into printer. They go face up.
- Press power for 4 seconds to turn on.
- Press “feed” button on printer for 2 seconds to feed a single label.
- Note: if you cannot reliably feed a single label, eVisitor will probably not be able to print.
2. Configure Windows
- Plug the USB cord into the computer.
- Install the driver.
- Printing Preferences, Page, Offset, Vertical: 3mm.
- In the Printing Preferences, Halftone: Error Diffusion.
- Click OK.
- Set Preferences, Advanced, Media Type: Labels with Marks (may not be necessary).
- For TANDEM DOT-Expiring Badges:
- Move the sensor aligned with one of the holes.
- Set Preferences, Advanced, Media Type: Labels with Marks.
- Print a test page from the windows driver. It will not look perfect.
- Note: If you can’t reliably print a Windows test page, eVisitor will probably not be able to print.
3. Configure eVisitor
- Login to eVisitor.
- Go to settings, devices, printer settings: “Reset Printer Settings to Default”.
- You may need to select the SP310 as your label printer.
- Test by printing several badges.
If you are NOT using eVisitor, you may need to set:
- Paper size
- Rotate
Resources
SP-310 Product Page

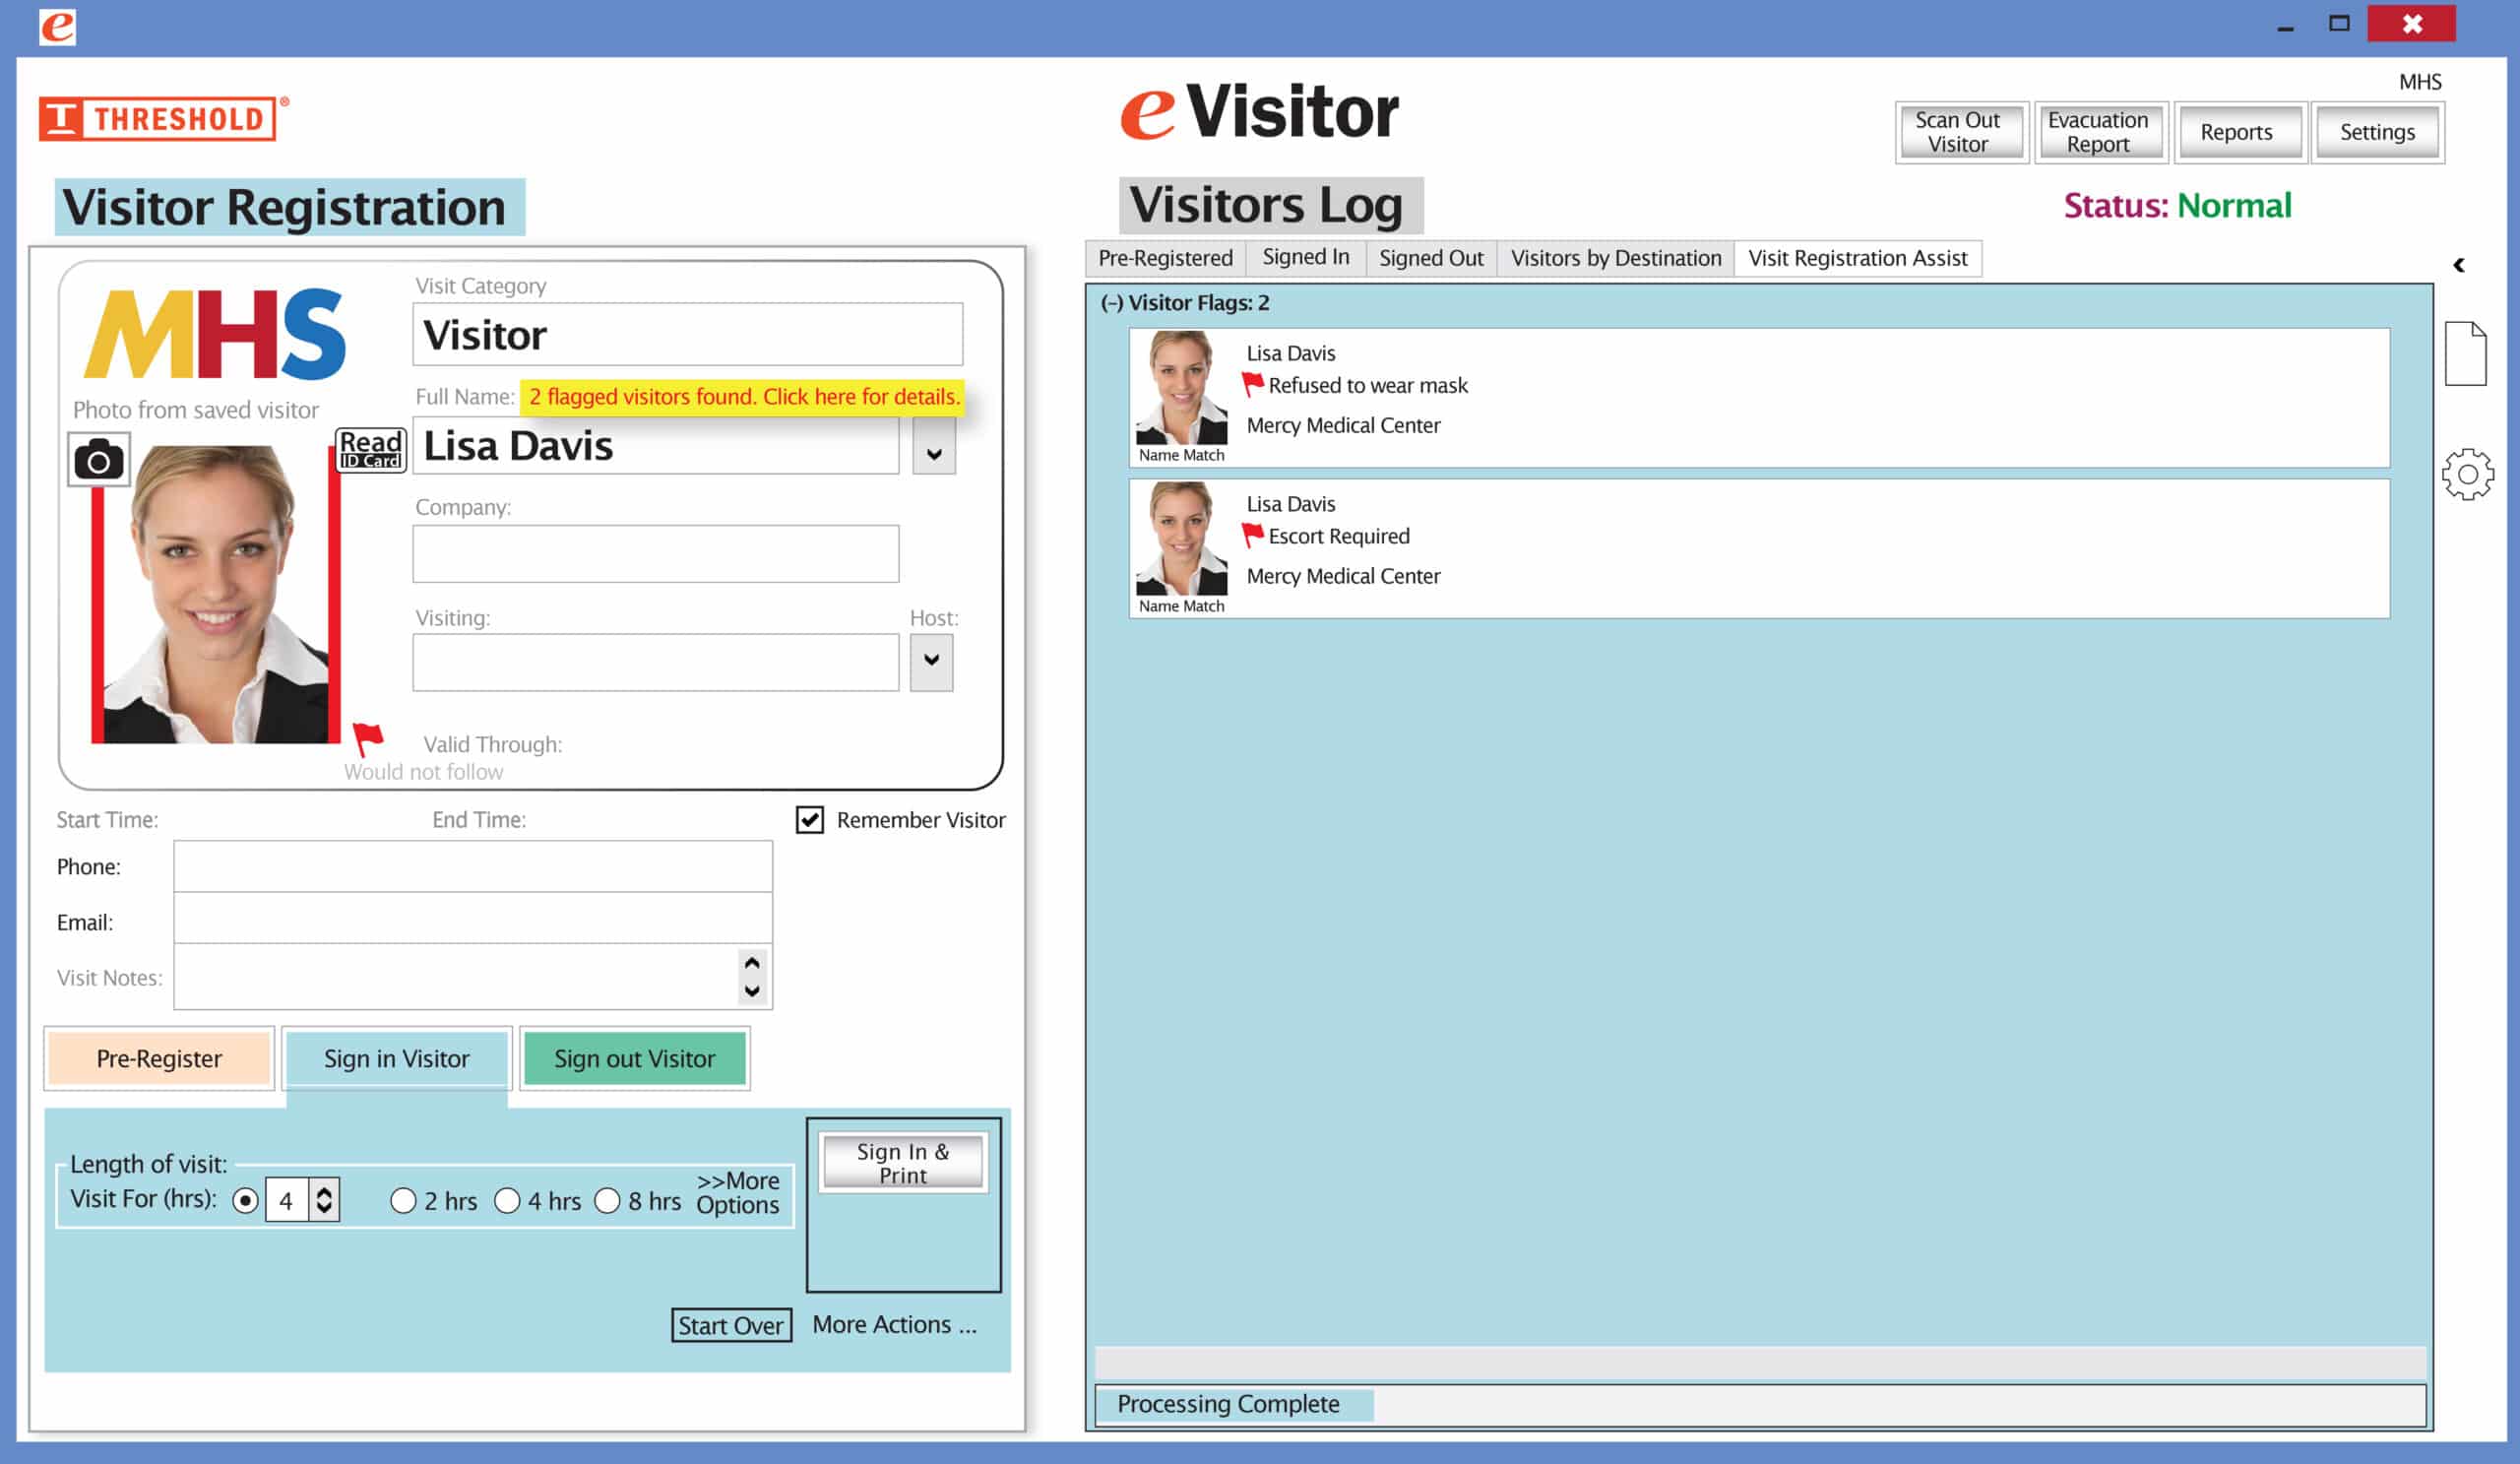 It’s easy and free to activate this feature. Simply call us and ask for “Red Flag, No Badge” to be turned on. Once it’s on, the above pop-up will come up when a red flagged visitor comes back. No badge will print and the attendant will need to follow the facility’s policy for handling red flagged visitors.