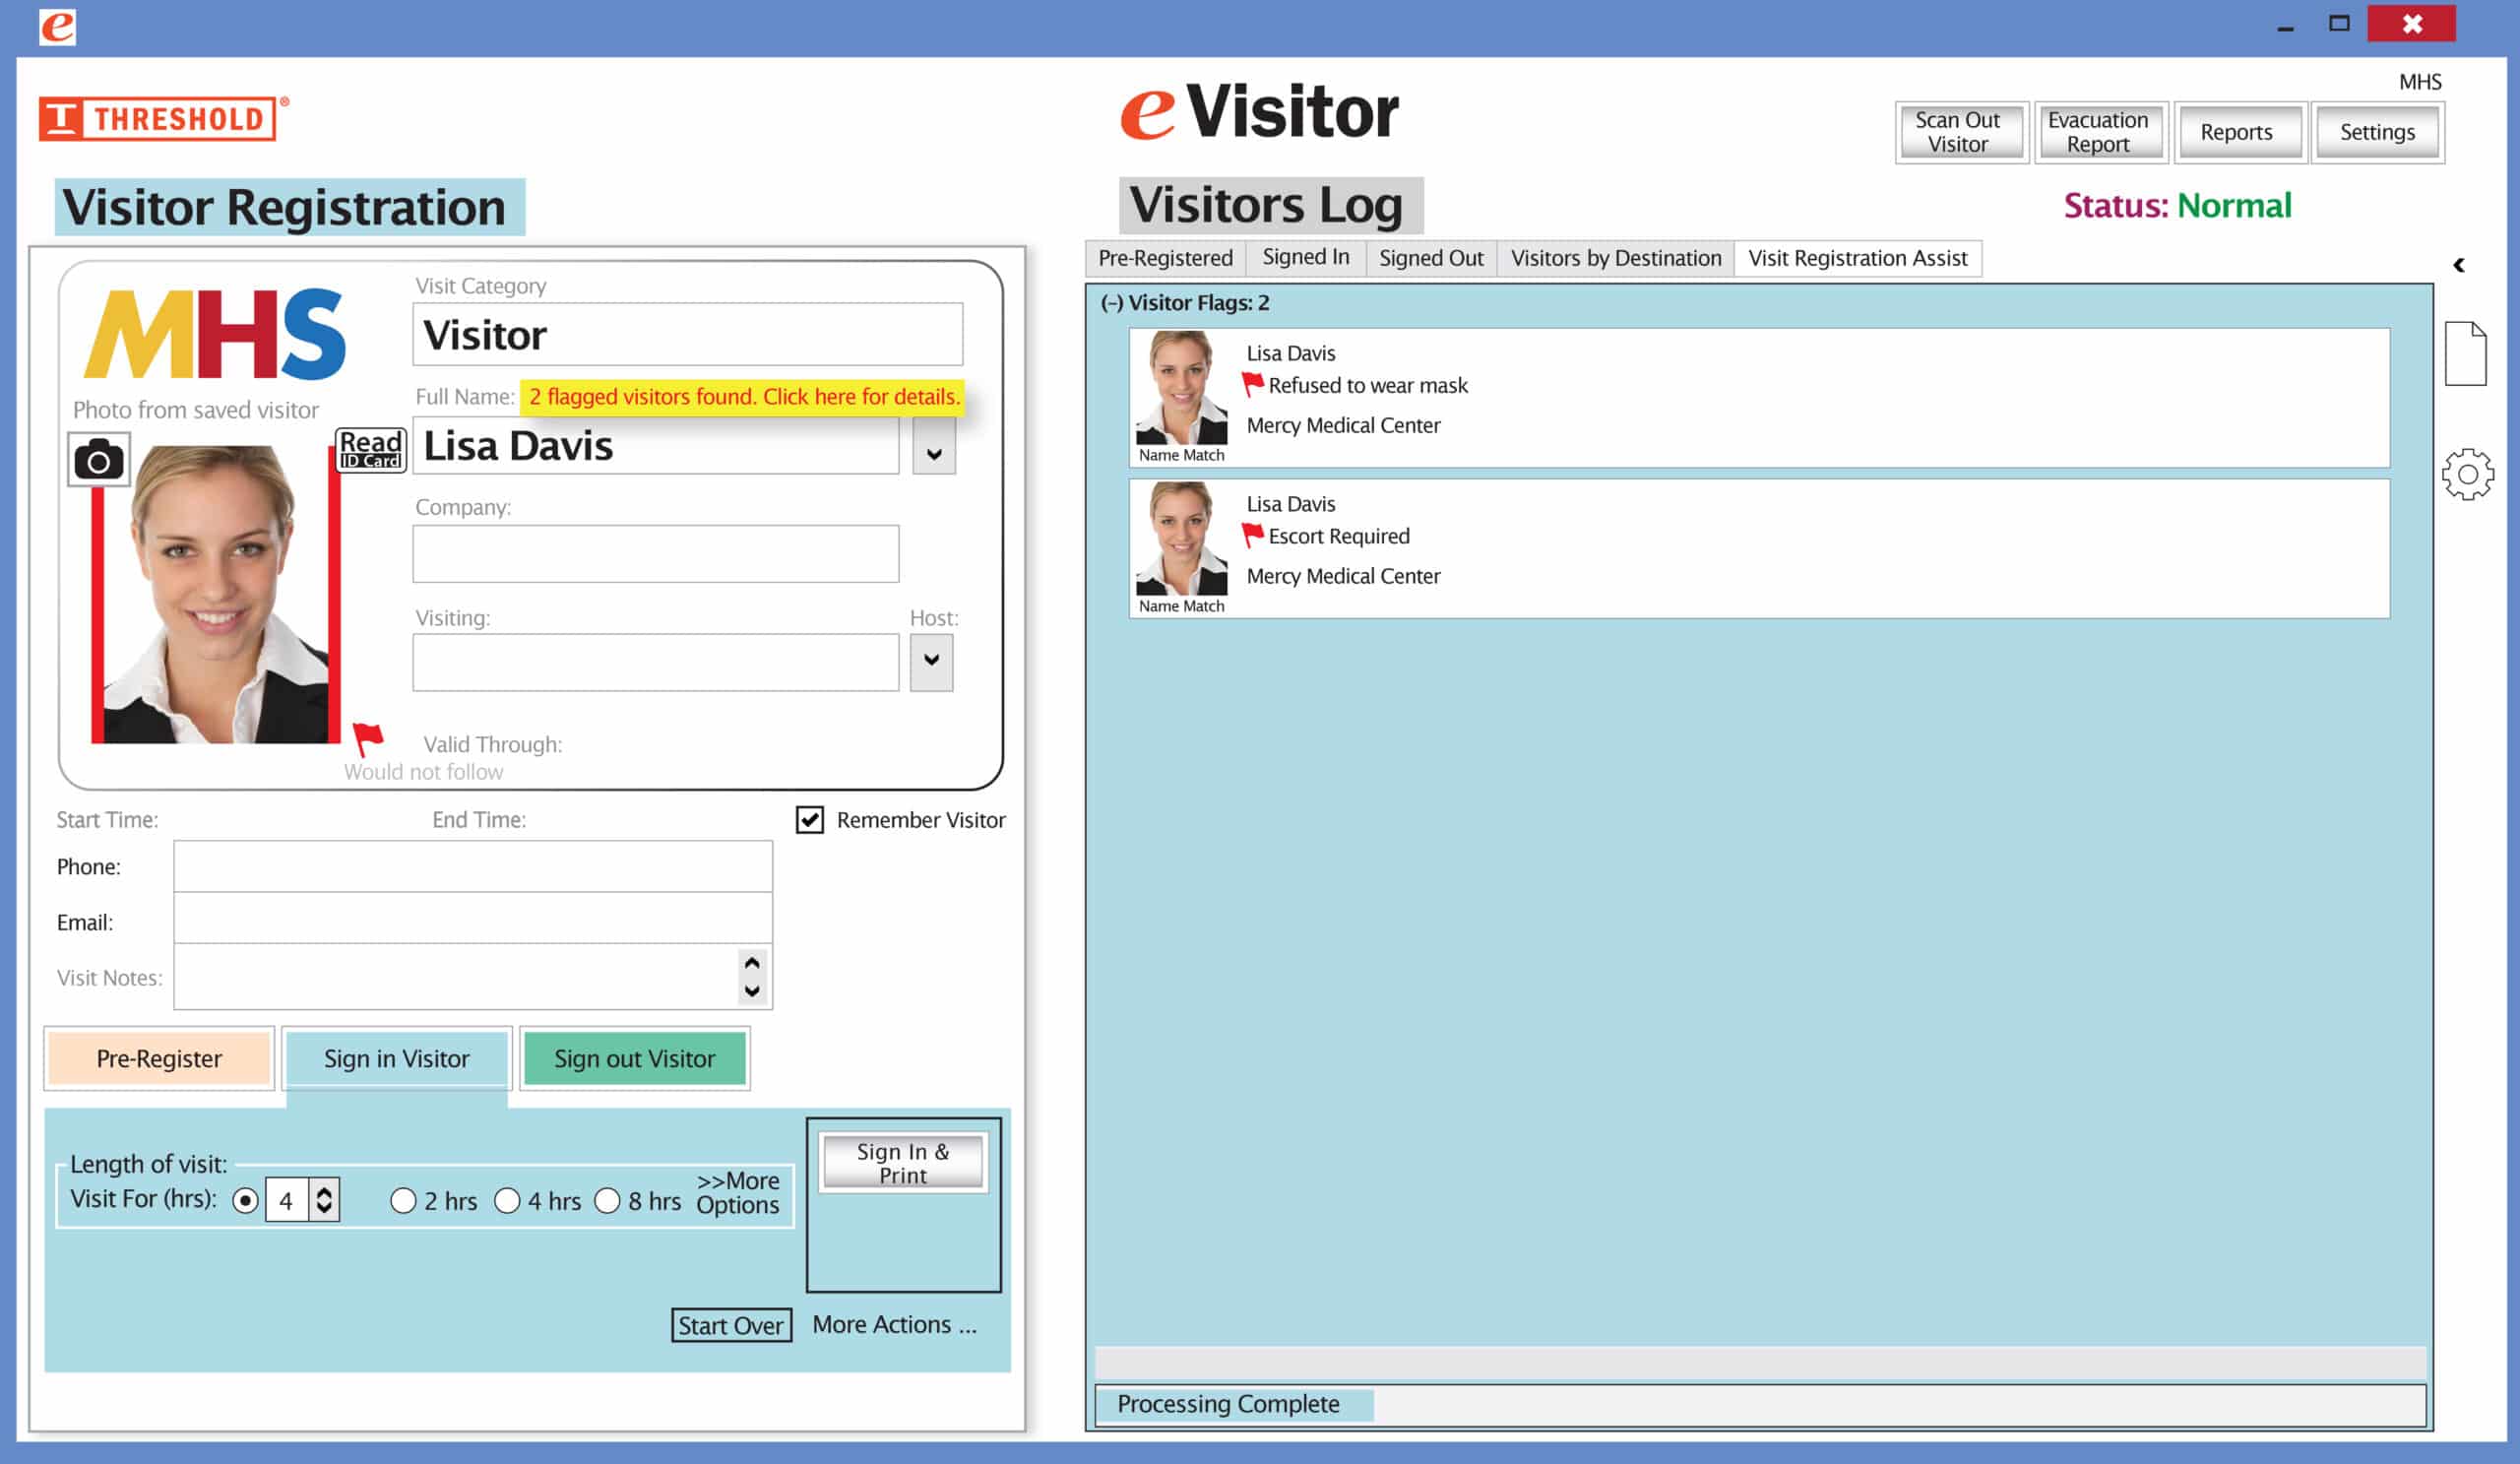
Primera LX 400
- Note: DON’T load the software from the enclosed CD. It has unnecessary software.
- Get the Primera LX400 PC Printer Driver: (click here for ver 1.35)
- Set Printer sensor to 2″ – (click here).
- Start, Devices and Printers, r-click on Color Label 400, Printing Preferences
Set Custom Page Size, Inches.- 4″ badges: Width=245, Height = 385 (width+ moves it down, height+ moves it right)
- 3″ badges: Width = 205, Height= 260
- Set Orientation to Landscape
- Set Print Quality to 2 or 3 (start with 2 for speed).
- Set Ink Saturation to between 70% and 90%. Start with 80% and adjust as needed.
- If under “printer properties” there is a button that says “Change Properties”, then there is a problem with the driver. It needs to be reinstalled under that account.
- You can try “Print Test Page” to see if windows can access the printer.
- To let all users use the printer: (you must be logged in as admin for the 3rd step)
- C:\Windows\system32\spool, r-click properties on the Printer folder, Security, users=full control
- C:\ProgramData, r-click properties on PTI folder, Security, users=full control
- Start, Control Panel, Devices and Printers, r-click Printer Properties, Security, Everyone= allow all
Primera LX 500
The settings are the same as for the LX 400
The control for the Sensor are moved to another screen
If the settings above don’t work for you, please call 800-243-1969 and we can help.
You may need to make some other adjustments for your environment. These settings produce a badge that was dry within 2 seconds of being printed and cut on a Primera LX 400 and a Primera LX 500.